
Table of Contents
- How Long a Residential Pool Construction Timeline Actually Runs
- What the Calendar Looks Like, Phase by Phase
- The Pool Construction Permit Process: Where Weeks Disappear Before Dig Day
- Phase 1: Excavation, Grading, and Site Access
- Phase 2: Steel Reinforcement, Plumbing, and Electrical Rough-In
- Phase 3: Gunite or Shotcrete, Curing Time, and Weather Delays
- Phase 4: Tile Installation, Coping, and Decking
- Phase 5: Plastering, Startup Procedure, and Water Chemistry
- What Is the Average Time to Build an Inground Pool?
- Frequently Asked Questions
Last Updated: October 2, 2026
How Long a Residential Pool Construction Timeline Actually Runs
A residential pool construction timeline runs about 8 to 16 weeks from dig day to swimming, but the full process often stretches to 4 or 6 months once permits and weather are counted. This guide from Swim Clean Pool breaks down every phase of pool construction timeline for residential projects, so you know what happens and where projects stall.
What the Calendar Looks Like, Phase by Phase
Construction itself is fast, but the gaps between phases are not. Here is how a typical schedule breaks down.
| Phase | Typical Duration | Main Risk |
|---|---|---|
| Permitting and HOA approval | 3-8 weeks | Zoning and engineering review |
| Excavation and grading | 2-4 days | Site access, weather |
| Steel, plumbing, electrical | 1-2 weeks | Inspection scheduling |
| Gunite or shotcrete | 1-2 days | Rain delays |
| Curing time | 3-4 weeks | None, this is fixed |
| Tile, coping, decking | 2-3 weeks | Material lead times |
| Plaster and startup | 1-2 weeks | Water chemistry balance |
The Pool Construction Permit Process: Where Weeks Disappear Before Dig Day
The pool construction permit process is the single biggest source of delay, and it happens before any work starts. Signing a contract and assuming digging begins next week is a common mistake.
- Zoning check: Confirms the pool fits setback rules from your property lines.
- Engineering review: Verifies the structure handles your soil conditions.
- HOA approval: Many neighborhoods require separate architectural sign-off.
Skipping the HOA step to “save time” backfires. Homeowners who dig first and seek approval later risk stop-work orders and, in some cases, being required to alter or remove completed work.
Zoning, HOA Approval, and Engineering Review
These three reviews run on separate clocks. Zoning is usually quick, engineering review takes longer because it depends on soil and structural data, and HOA approval can be slowest since boards often meet monthly.
A Pre-Dig Regulatory Checklist Most Guides Skip
Regulatory friction is the most under-planned phase of a residential pool project, and it varies block by block. Before you sign anything, run this checklist:
- Pull your plat and survey. Confirm exact property lines and recorded easements, utility, drainage, and sight-line easements can all shrink where a pool is legally allowed.
- Read the setback rules, not the summary. Most jurisdictions set minimum distances from side and rear property lines, and some add a separate distance from the primary structure. Ask the building department for the written standard.
- Check barrier and safety-code requirements. Many jurisdictions require a specific barrier height, self-latching gates, and anti-entrapment drain covers. These are code items, not upgrades, and they affect design.
- Request the HOA architectural packet in writing. Ask for current design guidelines, the submission deadline relative to the next board meeting, and the required drawing set. Boards that meet monthly can add four to six weeks.
- Confirm utility locate and marking rules. Call 811 before any excavation (811 Before You Dig). This is free and required in essentially every state, and it is separate from your building permit.
- Ask about inspection sequencing. Some jurisdictions require pre-gunite, bonding or grounding, and final inspections. Each is a scheduled appointment that can slip.
Build a one-page tracker with four columns: agency, submission date, expected review window, and approval date. Share it with your builder. When a project stalls, it is almost always one of these four rows, not the construction crew.
Why Two Neighbors Get Different Timelines
Two pools of identical size on the same street can clear permitting weeks apart. The usual causes are a corner lot with two frontage setbacks, a lot backing to a protected drainage channel, a stricter architectural review board, or a jurisdiction that routes pool permits through a separate structural review. Ask your builder how many permits they have pulled in your specific jurisdiction in the last year, that single question tells you more about your timeline than any national average.
Phase 1: Excavation, Grading, and Site Access
Excavation is fast, often 2 to 4 days, but site access decides whether it goes smoothly. Crews need room for equipment to reach the dig area without tearing up your yard or a neighbor’s fence.
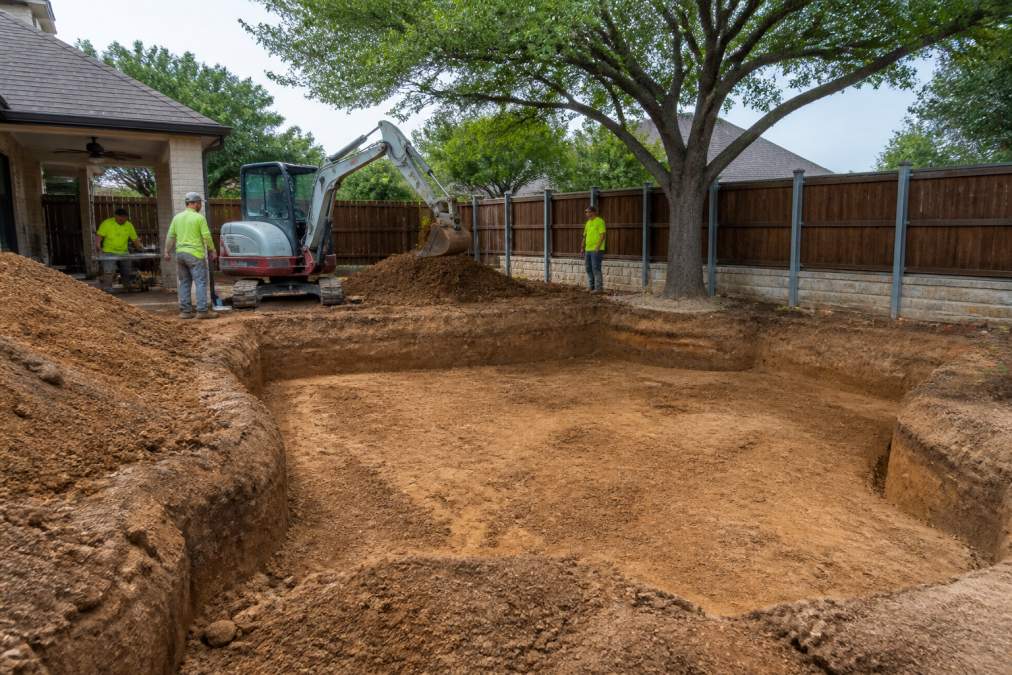
Ask your builder where the excavated dirt will go before dig day. Hauling it off site adds cost and time, and some projects save both by using it to reshape the yard.
Phase 2: Steel Reinforcement, Plumbing, and Electrical Rough-In
Steel reinforcement gives the shell its strength and goes in before any concrete. Crews tie a rebar grid following the pool’s shape, then plumb the filtration lines.
- Steel: Rebar grid tied to engineer specs.
- Plumbing: Return lines, skimmers, and main drains.
- Electrical: Conduit for pumps, lights, and controls.
Phase 3: Gunite or Shotcrete, Curing Time, and Weather Delays
Gunite or shotcrete is sprayed concrete that forms the pool shell, applied in a single day for most residential pools. Then curing begins, about 3 to 4 weeks, and it is not negotiable.
Curing time is the one phase you cannot speed up. Plan your landscaping and decking orders around it so crews are ready the moment the shell is set.
What Curing Actually Means for Your Schedule
Curing is not drying. It is a chemical reaction: hydraulic cement in the shell binds with water and hardens over time, needing moisture and moderate temperatures. Two things follow:
- Hot, dry, windy weather pulls moisture out of fresh shell too fast, which can cause surface cracking. Crews manage this by misting the shell or covering it, which adds labor days but not usually calendar days.
- Cold weather slows the reaction. Below roughly 40°F, the shell can be damaged by freezing before it gains strength, so crews may pause spraying or add blankets and heaters. That is where a cold snap turns into a real delay.
Supply Chain Contingency Planning
This is the phase where a stalled material order does the most damage, because the shell sits cured and ready while nothing moves. Ask about material availability before you sign:
- Which materials are long-lead? Natural stone coping, specialty glass tile, and certain paver lines are the usual culprits. Ask for a lead-time estimate in writing for every finish you selected.
- Who holds the order? Confirm whether your builder places finish orders at contract signing or at shell completion. Ordering at signing is the single biggest schedule protection you can get.
- What is the substitution policy? Ask what happens if a tile or paver is discontinued or backordered. A builder with a documented alternate in the contract is a builder who has done this before.
- Is there a staging plan? Materials that arrive early need a dry, secure place on site. Ask where they will be stored.
A verbal “it should be fine” on material availability is not a plan. Get lead times and order dates in writing, and tie a payment milestone to material delivery rather than to a calendar date.
Financial Milestones Tied to This Phase
Most pool contracts use progress payments, and the gunite and finish phases carry the largest draws. Map payments to completed, inspected work rather than dates:
- Shell complete and inspected, typically the largest single draw.
- Tile, coping, and decking complete, often a mid-size draw.
- Plaster and startup complete, final draw, sometimes held until water chemistry is stable.
Post-Construction Settling Period
Once the pool is filled and running, expect a settling window of roughly the first year:
- Deck and soil movement. Backfill soil consolidates, and deck sections can shift slightly. Small hairline cracks in deck joints are common and usually cosmetic.
- Plaster curing. Fresh plaster continues to cure underwater for weeks. During this window, water chemistry has to be watched closely, and brushing is typically required daily for the first couple of weeks.
- Equipment break-in. Pumps, heaters, and filters often need a first-month check and a filter cleaning.
Phase 4: Tile Installation, Coping, and Decking
Tile installation and coping come next, once the shell has cured. Coping is the cap around the pool’s edge, protecting the shell and giving a clean finish line.
- Tile: Waterline finish, choose before curing ends.
- Coping: Edge cap, sets the pool’s final shape.
- Decking: Surround surface, longest lead time.
Phase 5: Plastering, Startup Procedure, and Water Chemistry
Plastering is the interior finish that transforms the shell into a swimmable pool. After plaster, the startup procedure begins: filling the pool and balancing water chemistry so the finish cures properly.
Do not swim during the startup window. Fresh plaster needs time to cure, and early use can damage the finish and void related warranty coverage.
What Is the Average Time to Build an Inground Pool?
The average time to build an inground pool is 8 to 16 weeks of active construction, plus 3 to 8 weeks of permitting. Total time from contract to swimming usually lands between 3 and 6 months.
Several factors affect the schedule:
- Permitting speed: Local review times vary widely.
- Weather: Rain and cold slow shell work and curing.
- Material lead times: Tile, coping, and decking availability.
- Site access: Tight or oddly shaped yards slow excavation.
- Change orders: Mid-project changes reset the clock.
A Note on Financial Milestones and Settling
Two things most guides skip: map your payments to phases, not dates, and expect a settling period after completion. Small shifts in decking and soil are normal in the first year, and a good builder plans a check-in.
Frequently Asked Questions
What are the primary phases of residential pool construction?
A residential pool build moves through five main phases: design and engineering, permitting and HOA approval, excavation and grading, steel reinforcement with plumbing and electrical rough-in, gunite or shotcrete application, then tile, coping, and decking, and finally plastering and startup. Each phase depends on the one before it, so a delay in permitting or inspection pushes everything downstream. The full pool construction timeline for residential projects typically spans 8 to 16 weeks once digging starts, plus 4 to 8 weeks of pre-construction work.
How do weather and permitting affect the pool construction timeline?
Permitting is usually the biggest pre-dig bottleneck. The pool construction permit process involves zoning review, engineering review, and often HOA approval, and in many North Texas cities that alone can take 4 to 8 weeks. Weather matters most during excavation, gunite, and plastering. Heavy rain can collapse freshly dug walls or delay shotcrete, and plaster needs stable temperatures to cure. Builders build float into the schedule for rain days, but a wet spring can add two to three weeks.
What factors cause delays in custom pool building projects?
The most common causes are permit backlogs, HOA review cycles, material lead times for tile, coping, and equipment, weather, and inspection scheduling. Site access matters too: a narrow side yard or a large oak tree can slow excavation. Supply chain contingency planning, like ordering tile and pumps early and confirming a backup equipment model, prevents most of these stalls. Financial milestone mapping also helps, because tying payments to completed phases keeps subcontractors on schedule.
When is the best time of year to start a pool construction project?
Late summer through fall is ideal in most U.S. markets. Permits filed in July or August often clear by September, and excavation avoids the spring rainy season. Gunite and plaster cure better in mild temperatures than in extreme summer heat or winter cold. Starting in fall also means the pool is ready for the post-construction settling period and water chemistry balancing before the next swim season. Builders are also less booked then, which shortens the average time to build an inground pool.
Building a pool means juggling permits, inspections, and weather you cannot control. Swim Clean Pool removes that burden with full-service design-build management, a 100% custom design process, and one owner-led point of contact from start to finish. Get started with Swim Clean Pool and turn your backyard into a retreat your family will use for years.

